.NET Web API Build Pipeline
Repository with Azure Pipelines setup example
- Navigate to Azure Pipelines Dashboard
- Log in and create a new pipeline.
- Go to Pipelines -> Builds -> New Build Pipeline
- Go through the wizard: Connect to GitHub Yaml -> Select Repo -> ASP.NET Core Project -> Review
- On Review stage, refer to the Yaml below for how to approach creating a build artifact for a .NET app
The artifact produced is placed into
myArtifactsdirectory.
Steps at a glance:
graph TD;
id1("[BUILD] Build application")-->id2("[BUILD] Copy build artifacts to artifacts directory")
id2-->id3("[BUILD] Publish artifacts directory to central location as artifact")
id3-->idx("Artifact store (accessible between jobs)")
idx-->id4("[DEPLOY] Download artifact from central location")
id4-->id5("[DEPLOY] Use Azure Resource Manager to publish artifact to Azure App Services")
style idx fill:lightgreen,stroke:#333
# ASP.NET Core
# Build and test ASP.NET Core projects targeting .NET Core.
# Add steps that run tests, create a NuGet package, deploy, and more:
# https://docs.microsoft.com/azure/devops/pipelines/languages/dotnet-core

trigger:
- master

pool:
  vmImage: 'ubuntu-latest'

variables:
  buildConfiguration: 'Release'
  AzureSubscriptionServiceConnectionName: 'CHANGEME'
  AzureResourceGroup: 'CHANGEME'
  AzureWebAppServiceName: 'CHANGEME'

stages:
  stage: MyPipeline
  jobs:
    - job: BuildApp
      displayName: 'Build application'
      steps:
        - bash: dotnet build -c $(buildConfiguration) --output artifacts/
        - task: CopyFiles@2
          displayName: 'Copy build artifacts to Artifacts Directory'
          inputs:
            SourceFolder: '$(Build.SourcesDirectory)/artifacts'
            Contents: |
              **/*
            TargetFolder: '$(Build.ArtifactStagingDirectory)'
        - task: PublishBuildArtifacts@1
          displayName: 'Publish build artifacts to central location'
          inputs:
            pathToPublish: '$(Build.ArtifactStagingDirectory)'
            artifactName: myArtifacts
    - deployment: DeployApp
      dependsOn: BuildApp
      environment: 'MyAppDevEnvironment'
      strategy:
        runOnce:
          deploy:
            steps:
              - task: DownloadBuildArtifacts@0
                inputs:
                  buildType: 'current'
                  downloadType: 'single'
                  artifactName: 'myArtifacts'
                  downloadPath: '$(System.ArtifactsDirectory)'
              - task: AzureRMWebAppDeployment@4
                displayName: Azure App Service Deploy
                inputs:
                  appType: webApp
                  ConnectedServiceName: $(AzureSubscriptionServiceConnectionName)
                  ResourceGroupName: $(AzureResourceGroup)
                  WebAppName: $(AzureWebAppServiceName)
                  Package: '$(System.ArtifactsDirectory)/myArtifacts'
Next step is attaching the created artifact in the Build stage to Releases pipeline.
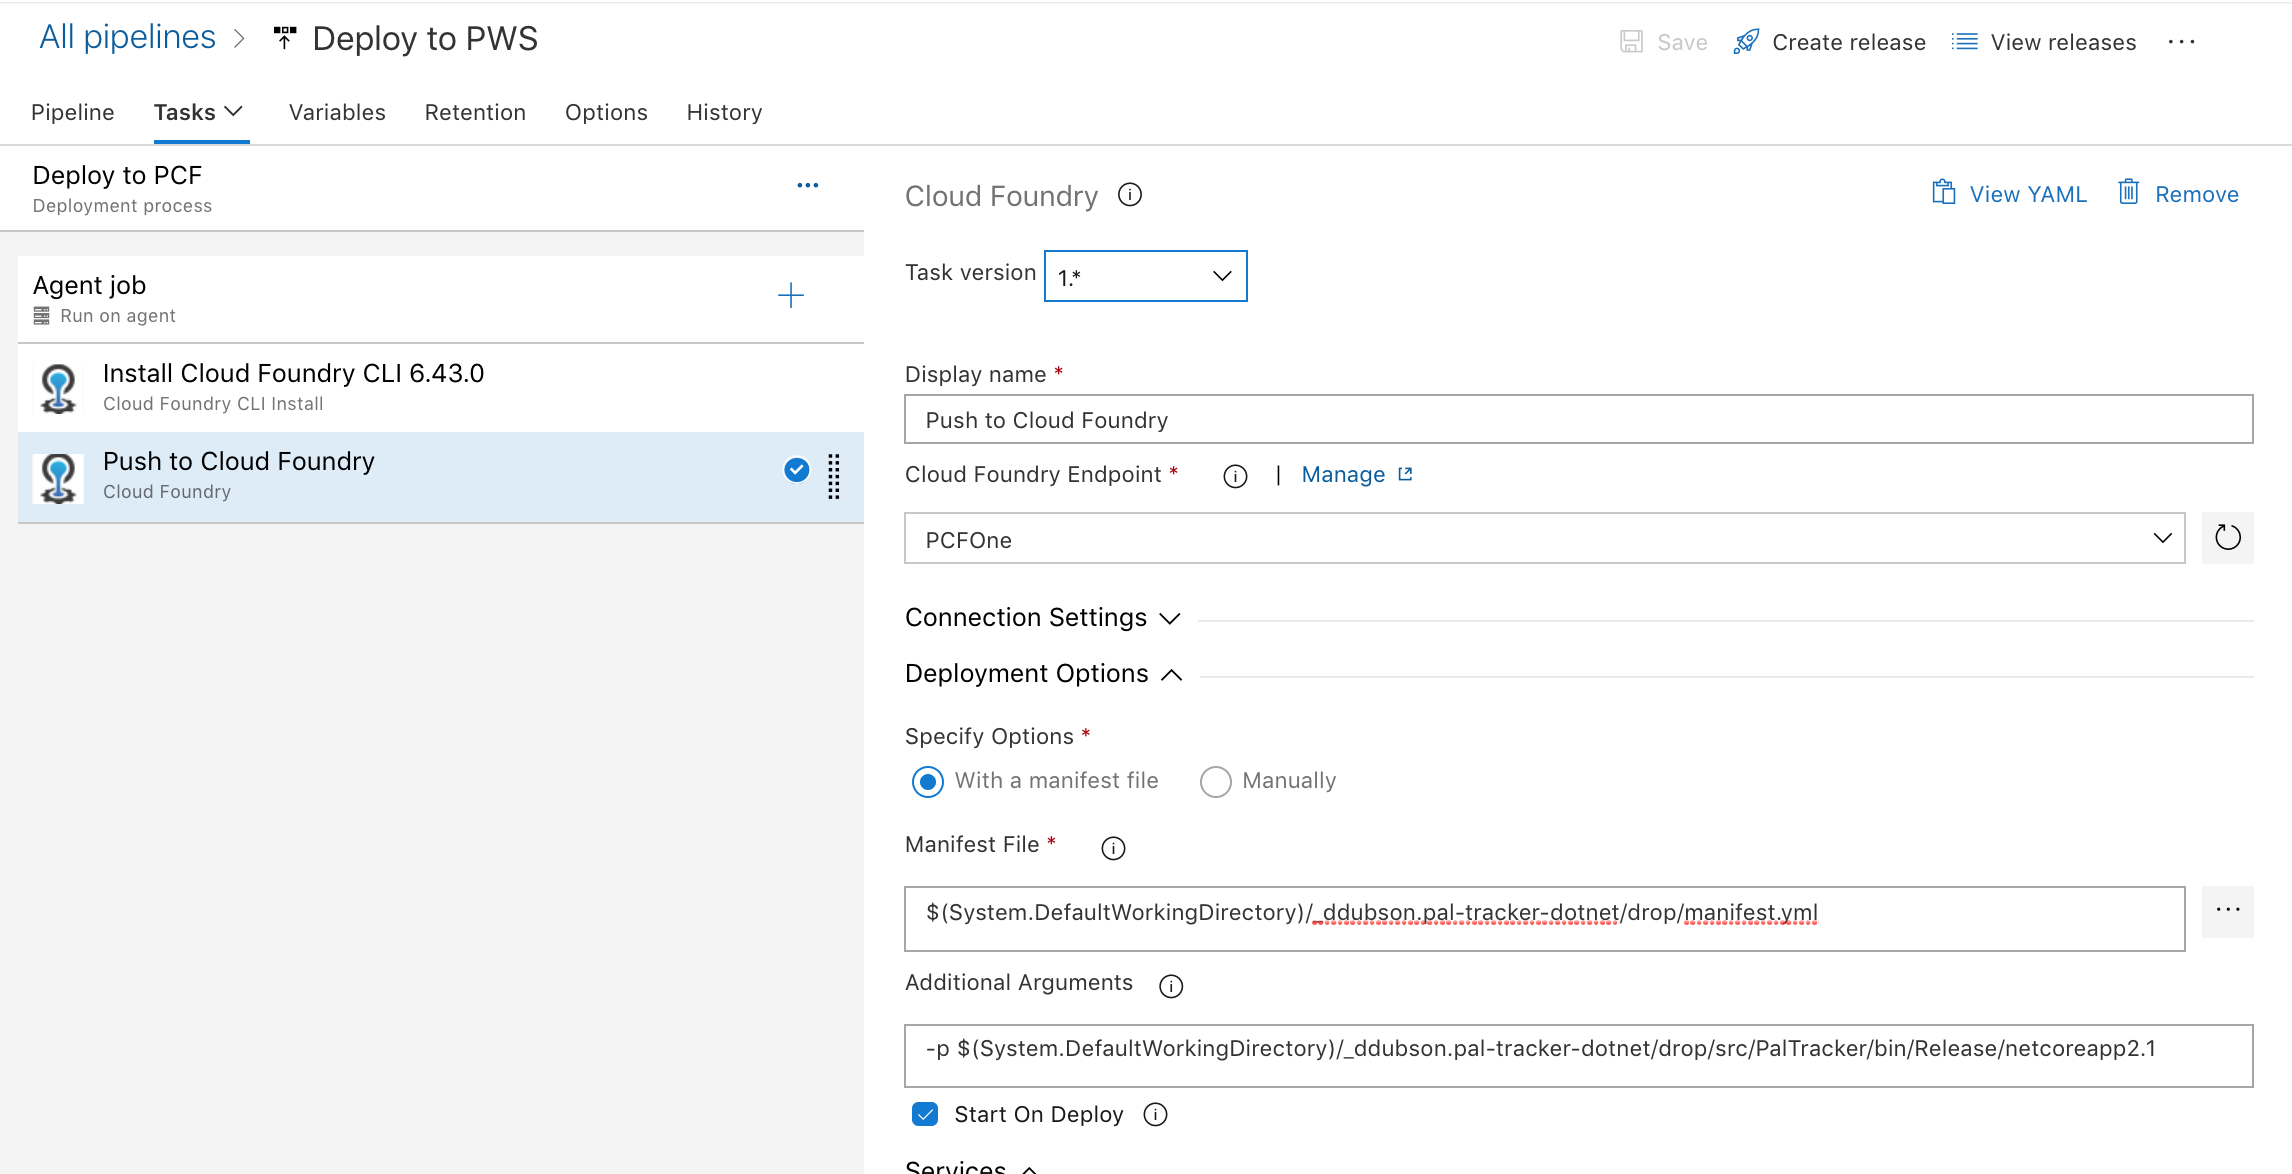
CloudFoundry deploy
Below is an example release stage configuration, deploying to Pivotal Platform:
The screenshot assumes you’ve placed your artifacts into
dropdirectory in the PublishBuildArtifacts step